I thought the trigger might be the hardest part of the whole project. It's a really asymmetrical, amorphous shape with lots of little nooks and crannies. That would make it really hard to machine by cutting away material. We thought about trying to make a mold and then casting the plastic, but it would be hard to create the mold by hand, and we would have to make a two-part mold since the trigger has lots of undercuts and details on both sides. We settled on 3D printing since it would be a one step process, and we could design it very accurately on the computer.
At first I tried modeling the trigger from scratch, like I did the lobes. I am by no means an expert with AutoCAD, so I had a much harder time with the amorphous shape of the trigger. Eventually, in frustration, I just googled "rock climbing cam 3d model" with no expectations. Well, hurray for the internet, somebody already did it! I just downloaded the trigger model and used that. It wasn't totally accurate, and was missing the little hooks on the underside that the trigger wires attach too, so after printing I took a soldering iron and some spare plastic and did some manual 3D printing! #artminor. You can view and download the model from the link above.
At first I tried modeling the trigger from scratch, like I did the lobes. I am by no means an expert with AutoCAD, so I had a much harder time with the amorphous shape of the trigger. Eventually, in frustration, I just googled "rock climbing cam 3d model" with no expectations. Well, hurray for the internet, somebody already did it! I just downloaded the trigger model and used that. It wasn't totally accurate, and was missing the little hooks on the underside that the trigger wires attach too, so after printing I took a soldering iron and some spare plastic and did some manual 3D printing! #artminor. You can view and download the model from the link above.

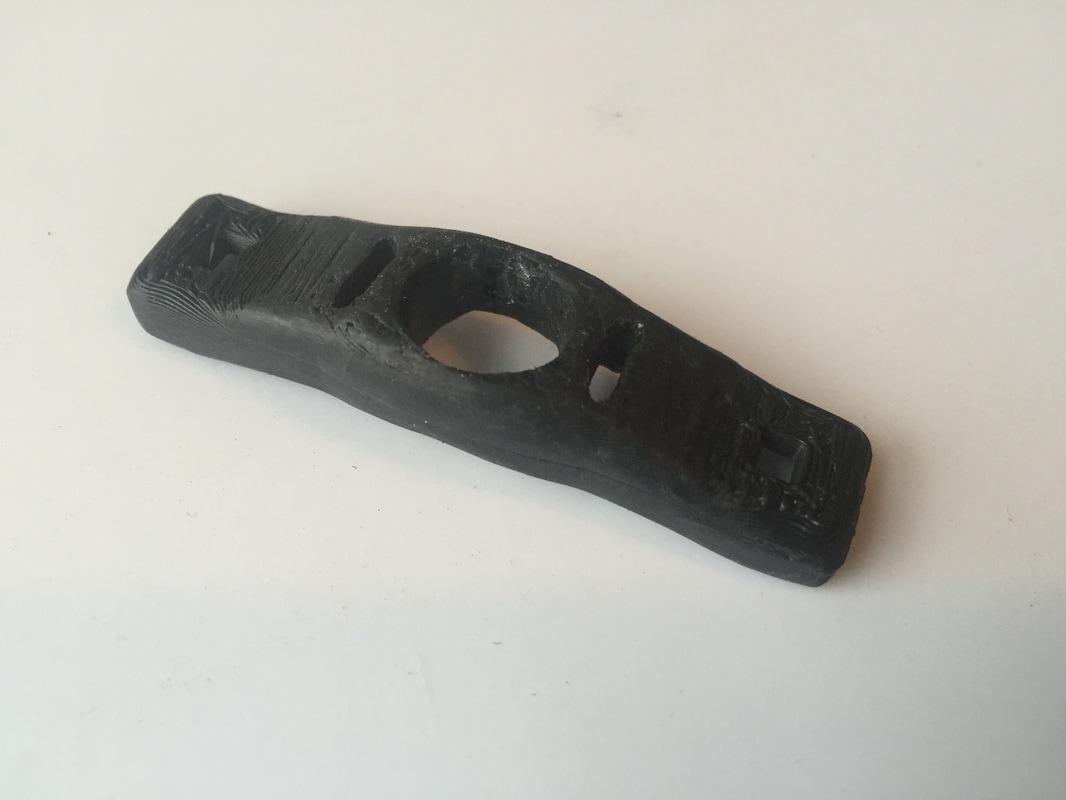
The underside of the trigger, after touching up the trigger wire hooks with a soldering iron.
The CAT lab in the school library has a 3D printer, but it can't do the resolution I wanted. So I turned to the Pikes Peak Makerspace in downtown Colorado Springs. PPM is a really cool organization. From their website: "We are a membership composed of Builders, Tinkerers, Engineers, Artist, Entrepreneurs, Designers, Educators all mashed up and revolutionizing creativity in the Pikes Peak Region. Our goal is to provide a facility with space and equipment for people to create physical items for fun and for education. It also is a place to gather interested people for all manner of classes and instruction." In their workshop they have a full metal and wood shop, a bunch of electronics equipment, a laser cutter, vinyl cutter, and two LulzBot TAZ5 3D printers, all free to use as a member. And through the Innovation@CC program, students can get free membership!
I went over to the workshop one afternoon, and printed out the trigger in less than an hour with help from fellow CS major John Sylvester '18 (He was over there working on his own absurdly cool project, FlyPhone, which leverages the powerful hardware and software of an iPhone to make a cheap, autonomous, personal filming drone!). We used High-Impact Polystyrene (HIPS), which is similar to ABS plastic. We weren't sure what kind of plastic the real trigger was made of, but who cares, our trigger functions the same.
I went over to the workshop one afternoon, and printed out the trigger in less than an hour with help from fellow CS major John Sylvester '18 (He was over there working on his own absurdly cool project, FlyPhone, which leverages the powerful hardware and software of an iPhone to make a cheap, autonomous, personal filming drone!). We used High-Impact Polystyrene (HIPS), which is similar to ABS plastic. We weren't sure what kind of plastic the real trigger was made of, but who cares, our trigger functions the same.
